
 Image 1 of 3
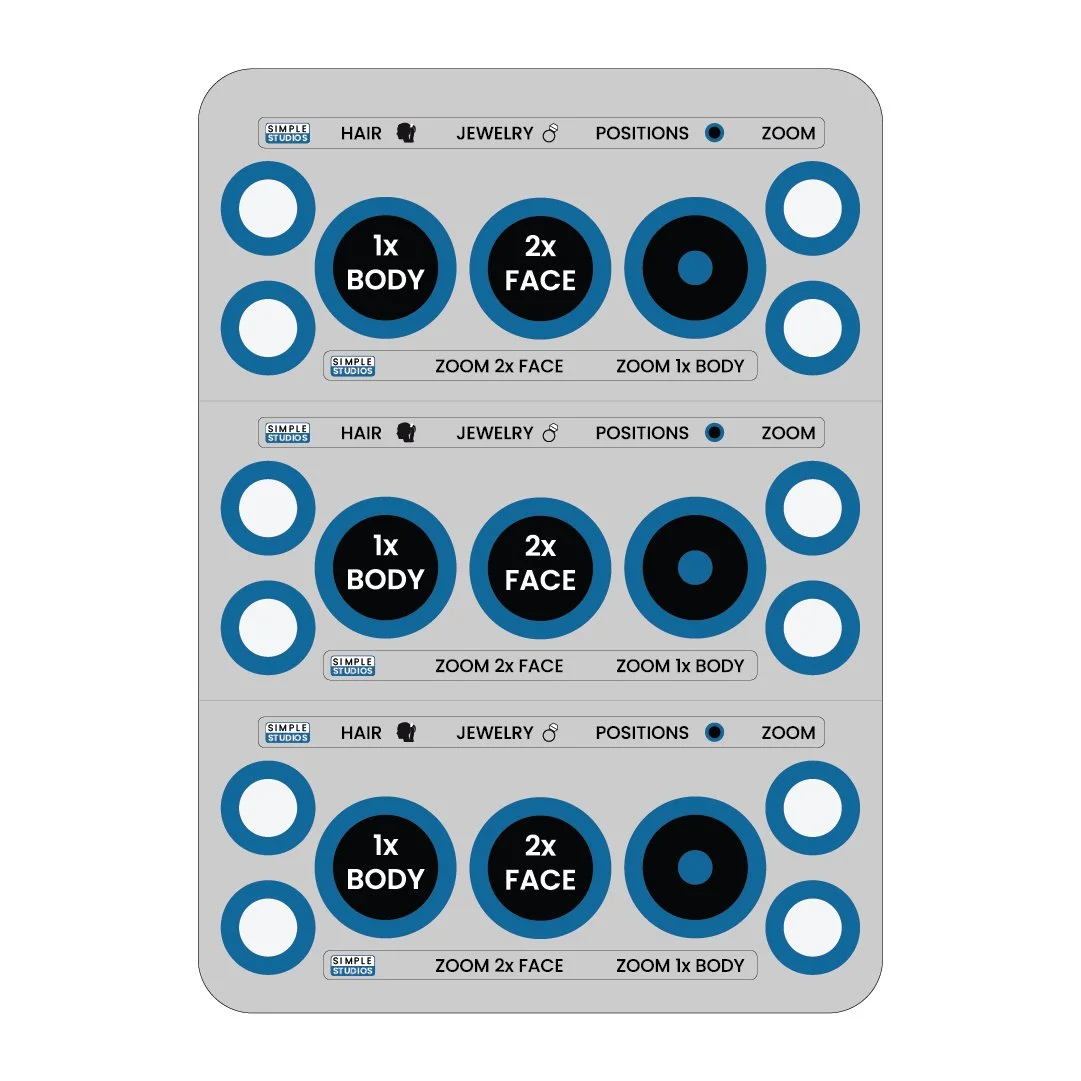 Image 2 of 3
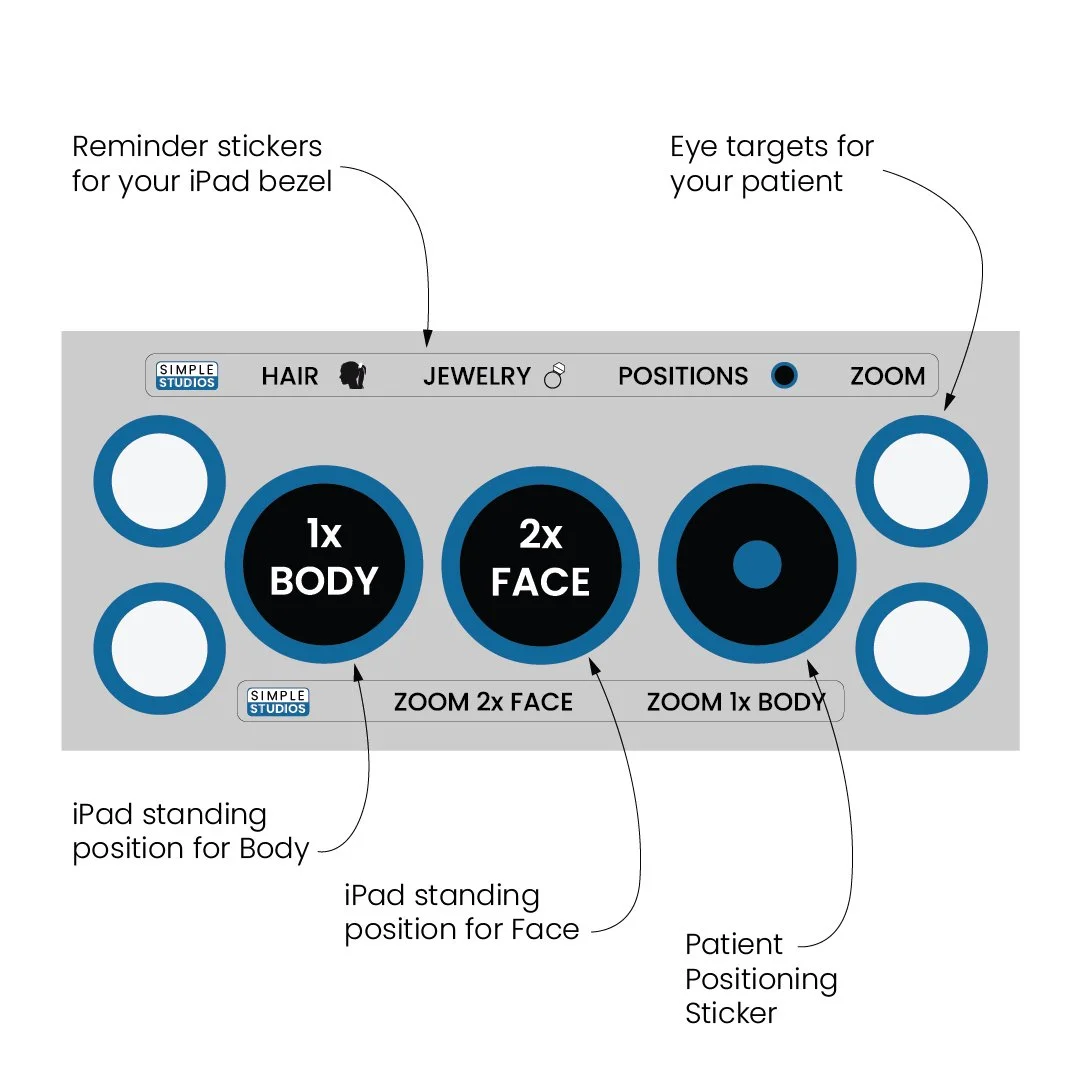 Image 3 of 3
Ready to Improve Patient Retention?
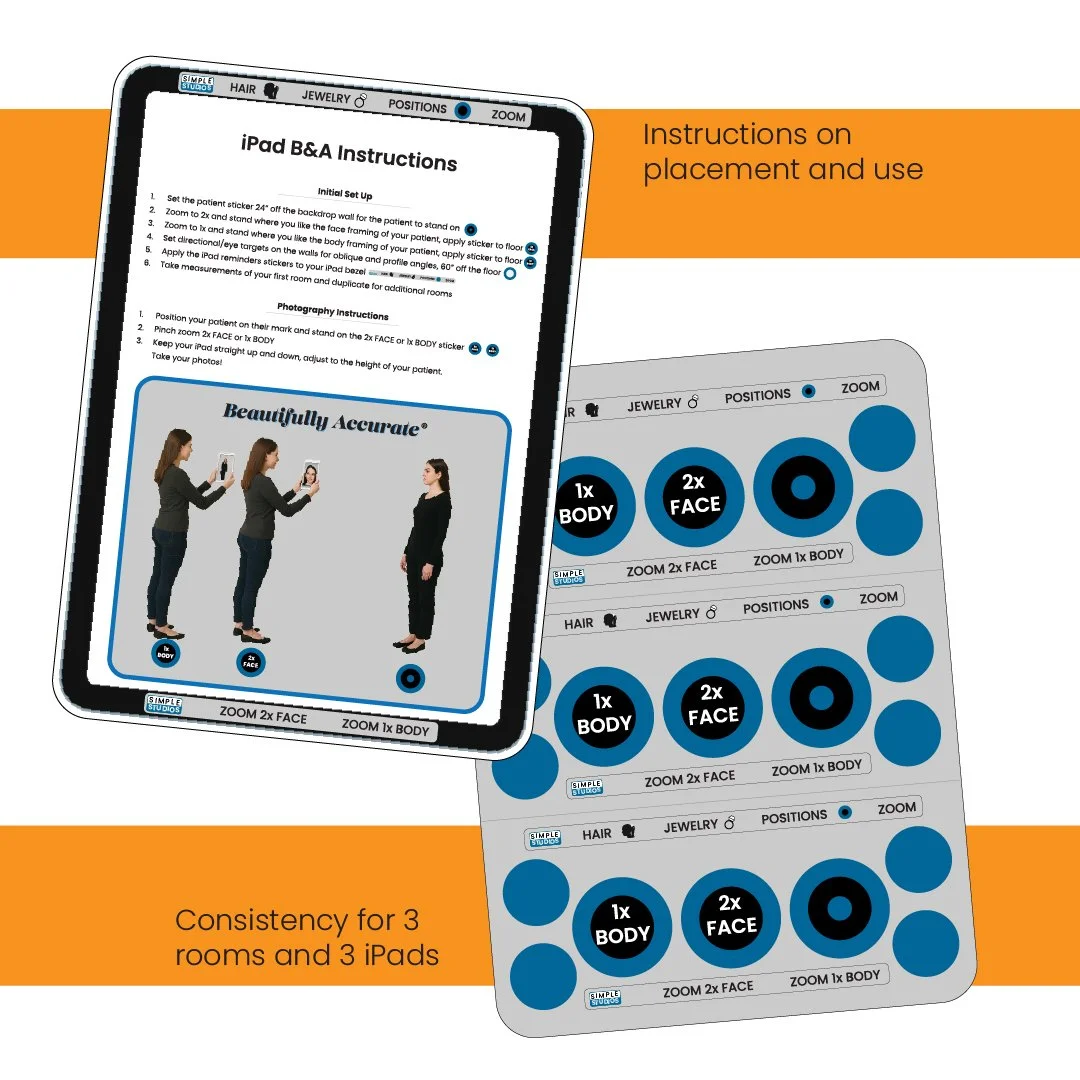
Get the most out of your iPad photography with consistent photos using specific marks to stand on for both your patient and the photographer.
Find the best location in each of your treatment rooms and apply the positioning stickers to ensure consistency between rooms and between patient visits.
What’s included:
Patient standing sticker
Photographer’s standing stickers for face photos
Photographer’s standing stickers for body photos
Eye targets for the walls
iPad bezel instruction reminder stickers
Instruction sheet for initial setup of each room
Operation instructions for everyday use
Why it matters:
Consistent photo positioning improves the quality and comparability of before-and-after images.
Repeatable framing builds patient trust and supports outcome tracking.
Standardized setup makes staff training faster and reduces variability between rooms and photographers.
Quick setup tips:
Choose a wall with good, even lighting that doesn’t change and NO background clutter.
Place the photographers 1x sticker where the camera frame captures full body.
Place the photographers 1x sticker where the camera frame captures the face.
Align eye targets on the wall to standardize eye gaze height and angle orientation.
Position photographer stickers so the distance remains consistent for each treatment room.
Apply bezel reminder stickers to the iPad.
Result: Faster, more reliable photo sessions that improve documentation, patient satisfaction, and retention.
Ready to Improve Patient Retention?
Get the most out of your iPad photography with consistent photos using specific marks to stand on for both your patient and the photographer.
Find the best location in each of your treatment rooms and apply the positioning stickers to ensure consistency between rooms and between patient visits.
What’s included:
Patient standing sticker
Photographer’s standing stickers for face photos
Photographer’s standing stickers for body photos
Eye targets for the walls
iPad bezel instruction reminder stickers
Instruction sheet for initial setup of each room
Operation instructions for everyday use
Why it matters:
Consistent photo positioning improves the quality and comparability of before-and-after images.
Repeatable framing builds patient trust and supports outcome tracking.
Standardized setup makes staff training faster and reduces variability between rooms and photographers.
Quick setup tips:
Choose a wall with good, even lighting that doesn’t change and NO background clutter.
Place the photographers 1x sticker where the camera frame captures full body.
Place the photographers 1x sticker where the camera frame captures the face.
Align eye targets on the wall to standardize eye gaze height and angle orientation.
Position photographer stickers so the distance remains consistent for each treatment room.
Apply bezel reminder stickers to the iPad.
Result: Faster, more reliable photo sessions that improve documentation, patient satisfaction, and retention.